FFXIAH.com

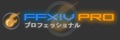
Open the tool by downloading and running ximtools.jar (can run it like a .exe file, requires a recent version of the JDK to be installed). Alternatively, checkout the source code and run GuiMain.kt. Video tutorials are available here. The text guide below is for an early version, so some parts are out-dated/obsolete. --- Use the "Export to glTF" tool to convert an item-model resource to glTF. Currently, this works by selecting Race/ItemModelSlot/ModelId. Here's a list of ModelIds by item-name (from LandSandBoat). Selecting "include animations" will export the race's default animations (idle, jump, etc), which can be useful for checking the model in different poses. Clicking "export" will create a .glTF file in the tool's local directory (as shown on the right). |
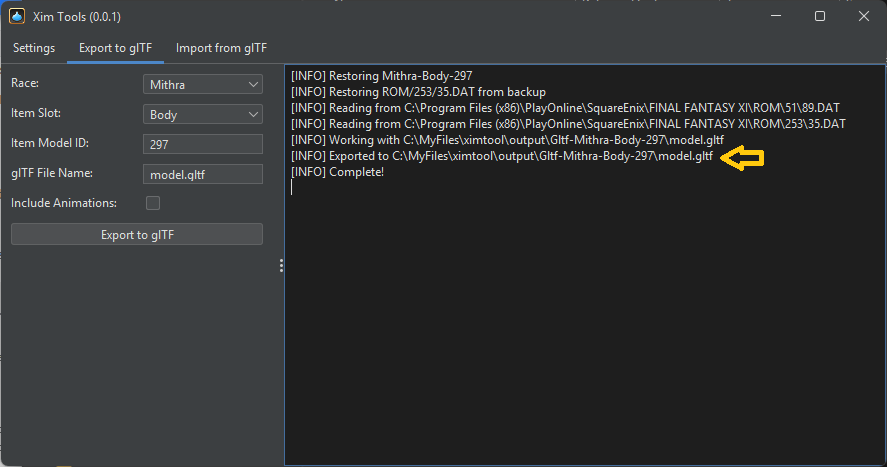 |
The glTF file can be opened in Blender (and probably other 3D modelling software). The default import settings are good - nothing needs to be changed. |
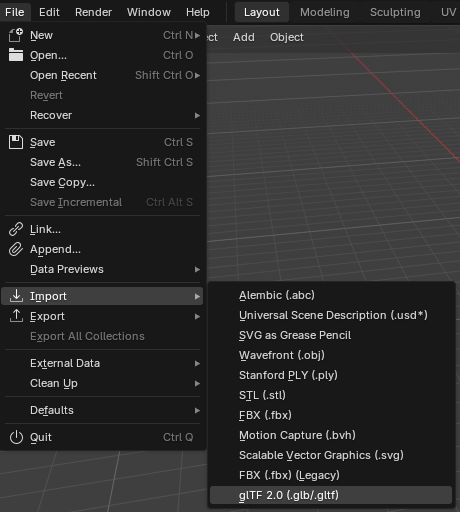 |
You're now free to modify the mesh (the skeleton's joints are displayed as spheres). Keep the following in mind:
|
 |
FFXI skeleton meshes have some important metadata. This is filled in automatically, but if you are creating entirely new meshes, you may need to populate this data.
|
 |
When exporting the data, there are a few important settings:
|
 |
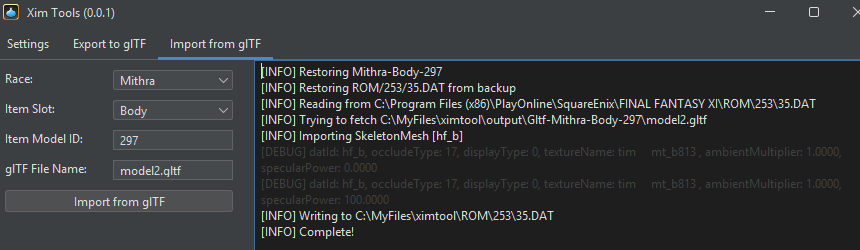
Back in XimTools, navigate to "Import from glTF" and fill out the Race/ItemModelSlot/ModelId. Set the "glTF File Name" to the one you used when exporting from Blender (model2.gltf in the above screen shot.) Then, press the "Import from glTF" button. This will create a .DAT file. By default, the .DAT file will be created in the tool's working directory, but this can be changed in the "Settings" tab. The import-log will display information about the "Custom Properties" to help ensure they were set/imported correctly, and display the full path to the .DAT file. The .DAT file can be copied to the FFXI directory, or loaded with an addon like XiPivot. |
 |
Blender Animation Export Settings
Format is set to glTF Separate
"Include > Data > Custom Properties" is checked
"Animation" is checked
"Animation > Animation Mode" is set to "Actions"
"Animation > Rest & Ranges > Set All gltf Animation Starting at 0" is checked
"Animation > Sampling Animations" is checked
"Animation > Sampling Animations > Sampling Rate" is set to 24
"Animation > Optimize Animations > Optimize Animation Size" is NOT checked